
Fold the hem facings downward at the jacket body's center front.
Pin the jacket lining assembly to the jacket body assembly along the center front and neckline, right sides together, then sew the lining assembly to the body assembly, using division-color thread for the yoke and black for the jacket body.

Clip away the upper corners of the front opening, and clip the neckline seam allowances as needed for it to turn well.
Turn the jacket's right side out (so the lining is on the inside) and press the center front and neckline edges.
Carefully pin the jacket body to the lining at the yoke/body and yoke facing/lining seam lines, matching the two exactly, then "stitch in the ditch" through all layers with black thread as far as possible to secure the lining assembly. (We recommend stitching up to about 2" from the armscye, if you're able.)

You may also wish to "stitch in the ditch" in the same manner along the centermost 1-2" of the shoulder seam using division-color thread (just stop before you get to your shoulder pad!), as well as your jacket's back.
Fold the jacket's hem facings upward again.
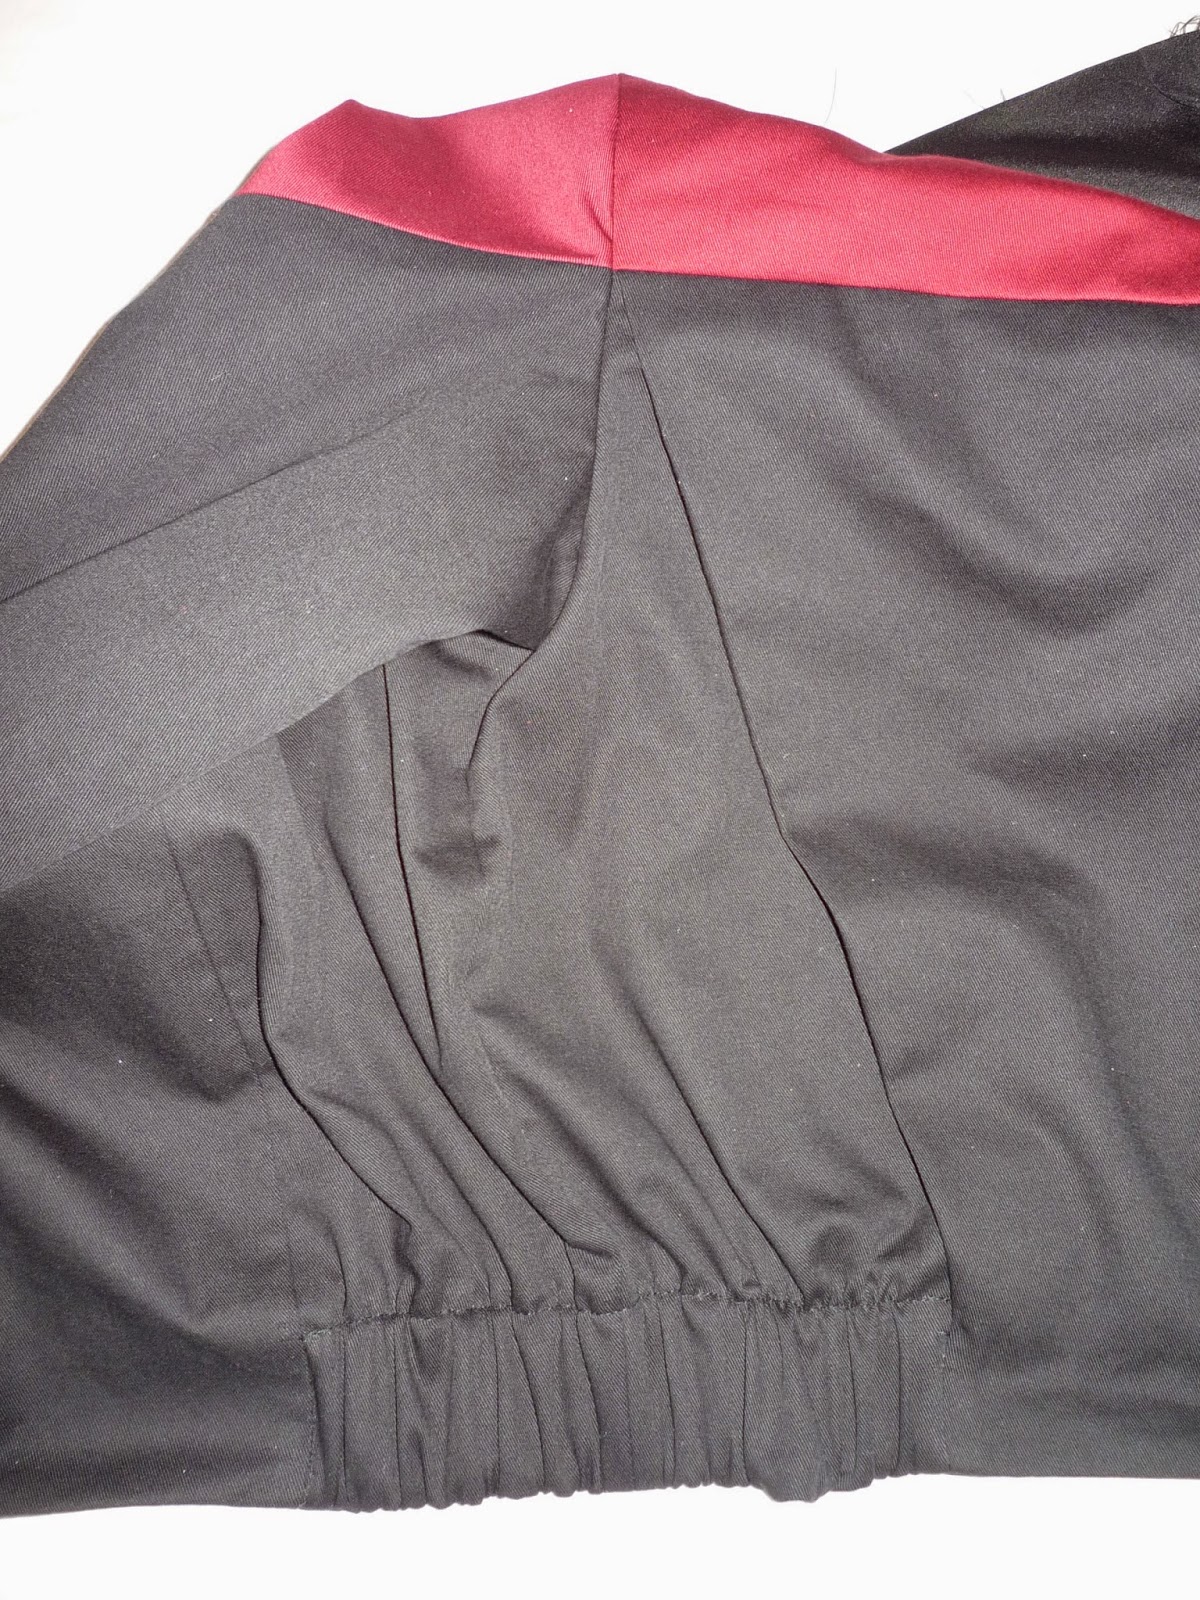
 Stretch your jacket's side panels back to their original shape, pulling the elastic as needed for the jacket to lie flat.
Using a zipper/piping foot and black thread, secure the upper edge of the side waistband facing to the jacket by stitching through all layers from the center back/side back seam line to the center front/side front seam line, using the upper edge of the elastic as a guide. (This should be ⅜" from the top of the waistband.)
Once finished, your jacket sides should look something like this:
Turn the hem facings upward (including the bottom portion of the front facing) and press.

Hand-sew the top of the center front and center back hem facings to the underlining.
Fold the front facing back to the underside.
Hand sew the front facing to the hem facing at the bottom of the jacket where the two overlap.

OPTIONAL: If you were unable or did not wish to serge the facing edge for some reason, or if you wish to further prevent fabric unraveling, apply liquid fray preventer to the edge you just sewed.
OPTIONAL: To further prevent your front facings from flapping about, hand sew the facing/lining seam allowances to the underlining.

Pull up the bottom of the lining so the its raw edge and seam line are flush with those of the hem facing.
Slip stitch the lining assembly bottom to the jacket bottom, matching seam lines and leaving the centermost edges free for the time being.

TIP: It's extremely helpful to have somebody else stretch out the jacket sides temporarily while you vertically pin the lining into place every half inch or so, then, while hand sewing, bend the jacket over a finger or two to sufficiently stretch it. It can be pretty annoying and/or time-consuming, which might be part of why this jacket was so seldom seen on-screen ...
 |
| I hate this! |
Press the excess lining downward, forming a jump pleat.
Slip stitch the front edge of the lining to the front facing along the lower edge and press.

Lastly, hand sew the sleeve lining to the sleeve, matching raw edges, and press the excess sleeve lining downward.
CONGRATULATIONS!
YOU'RE FINISHED!

If you found this tutorial helpful, please support my costume research on Ko-Fi! :)
No comments:
Post a Comment