Stay-stitch the lower corner at the top of the sleeve (piece H), where the shoulder point will be attached, ⅜" from the edges, and clip the sleeve vertically from the corner to the stay-stitch's pivot point.
Sew the shoulder point (piece G) to the sleeve, right sides facing.
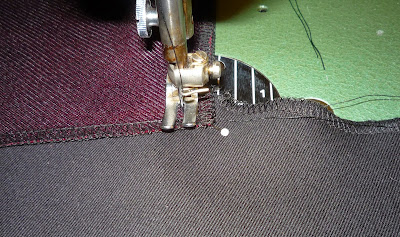
TIP: With the shoulder point on top, stitch to the pivot line (you can mark this with chalk, a disappearing ink fabric marker, or even a pin), and stop with the needle still in the fabric. Lift the presser foot and rotate the sleeve so that the other sleeve edge is flush with the other edge of the shoulder point, lower the presser foot, and continue stitching.
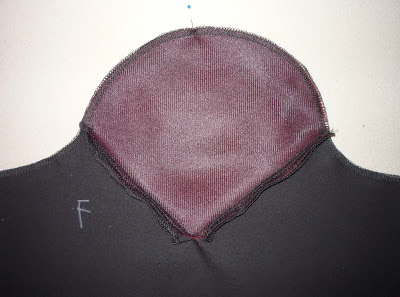
Once you've sewn the shoulder point onto the sleeve, it may initially look something like this:
And you'll feel like this:
But don't worry! A sleeve even this "bad" can be salvaged with very little effort, and we'll show you how.
Turn the sleeve over so the wrong side faces upward.
Notch the shoulder point seam allowances at the bottom corner.
Steam and press the area directly beneath the corner of the shoulder point.
If steam doesn't get the job done, you may want to lightly spray a bit of water on the area and press it again.
See how much better it already looks?
Press the shoulder point/sleeve seam allowances open.
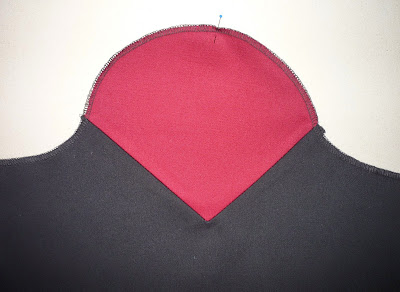
At this point, the sleeve should be looking way, way better:
As a finishing touch, we recommend interfacing the area directly beneath the bottom corner of the shoulder point to keep it looking nice, flat, and crisp.
Cut a small, rectangular piece of lightweight or midweight fusible interfacing (about 2" x 1" or so).
We recommend cutting it with pinking shears ("pinking" it), thus minimizing the effect of strong, linear imprints on the right side of the garment where the edges of the interfacing are, better obscuring them.
Make sure the fabric area beneath the shoulder point is wrinkle-free, then fuse the interfacing strip to the wrong side of the sleeve. We recommend placing one of the pinked wedges directly beneath the bottom corner of the shoulder point, as high as possible.
This interfacing is a subtle touch, and, theoretically, if you've done a good job with the sleeve thus far, you might not even "need" it; here is a picture of the same sleeve before and after the interfacing was applied.
|
|
As you can see, the difference is subtle - especially when the finished garment is worn and moving - but it is a genuine improvement and helps keep it looking nice by preventing future wrinkling beneath the shoulder point.
Repeat for the other shoulder point/sleeve.
Here's a sleeve comparison before and after notching the shoulder point seam allowances, thoroughly steaming and pressing the area beneath the shoulder point, pressing the shoulder point/sleeve seam allowances open, and fusing pinked interfacing beneath the shoulder point.


No comments:
Post a Comment